Level RV App - Complete How-To Guide
📖 Table of Contents
⚙️ 1. Initial Setup
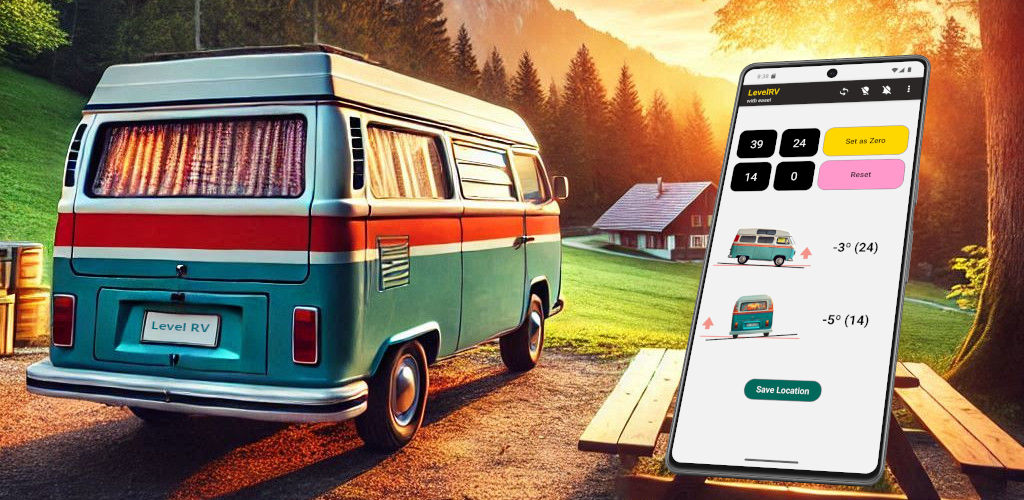
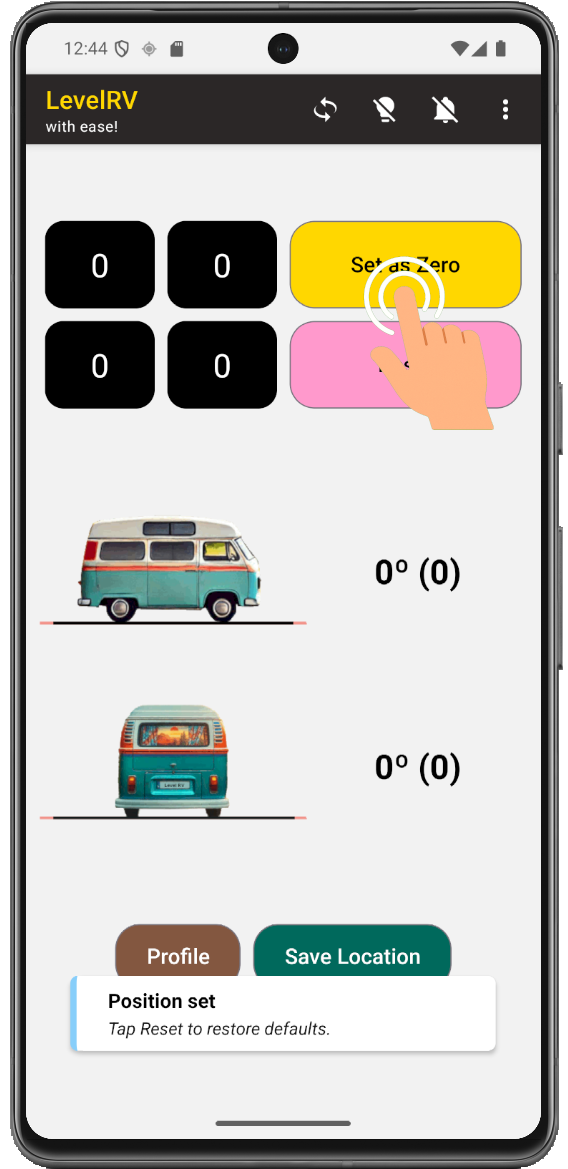
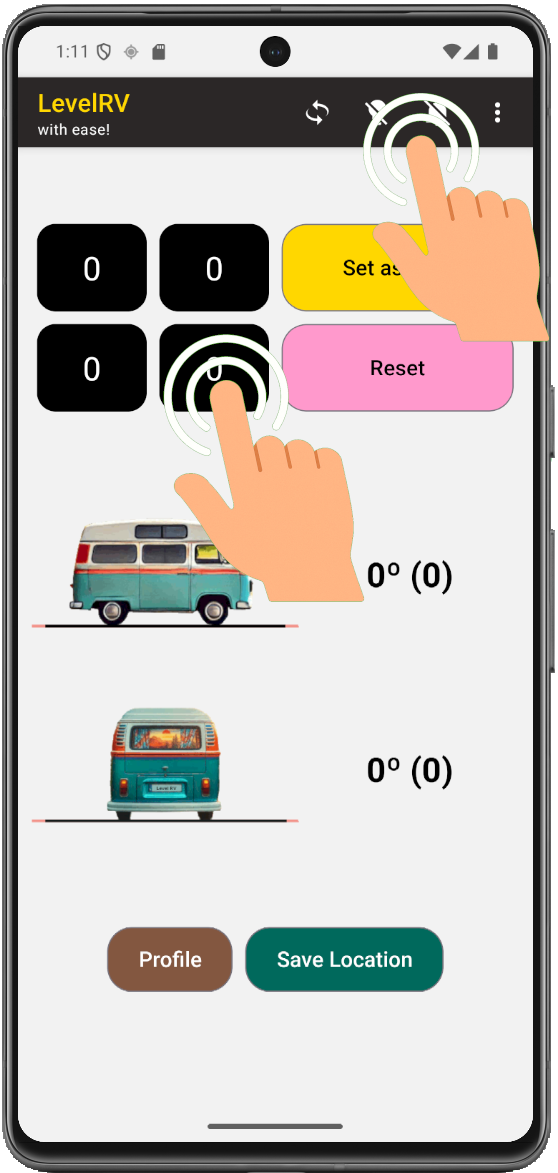
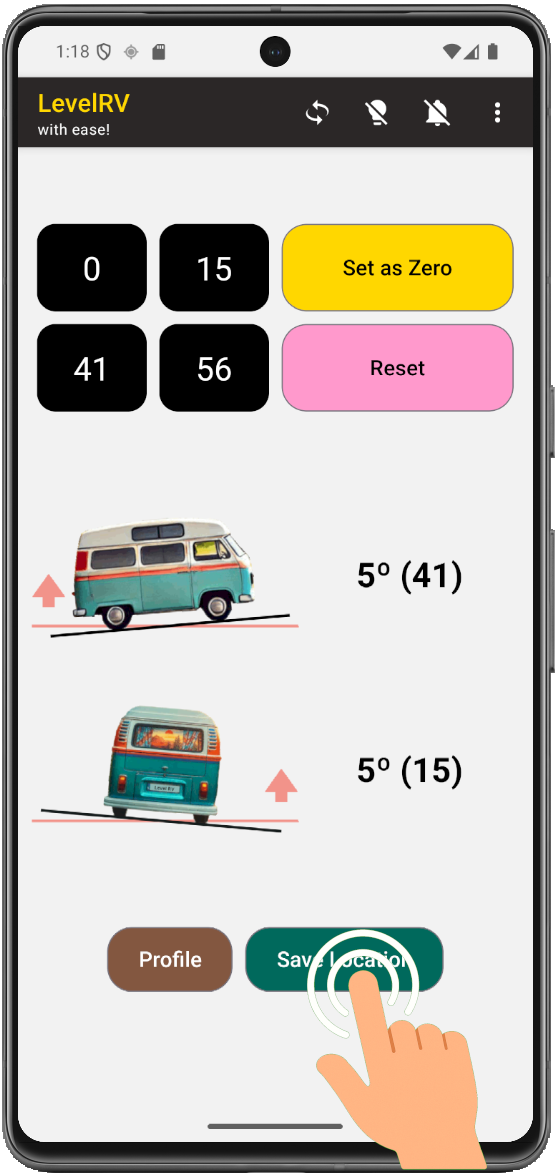
🎯 Set as Zero (Calibration)
Defines what “level” means.
- Place phone in your chosen position (doesn't have to be on the flat spot, can be any location e.g. Dashboard)
- Tap Set as Zero
You can calibrate on flat ground OR any position you prefer as “level”.
📐 RV Dimensions
Enter your vehicle size to enable wheel-by-wheel leveling guidance.
- Go to Menu → Settings
- Enter Length (front ↔ rear axle)
- Enter Width (left ↔ right wheels)

Why it matters:
The app converts tilt into real-world corrections (cm / inches per wheel).
The app converts tilt into real-world corrections (cm / inches per wheel).
🧪 Sensor Sensitivity
Controls smoothness vs responsiveness.
- Low → stable, precise
- High → fast but more jitter
Sensitivity affects smoothness only, not accuracy.
🚐 Vehicle Image Selection
Select a vehicle image that matches your RV type for better visual leveling guidance.
- Go to Menu → Settings
- Tap Select Image
- Select the image that best represents your vehicle
Why it matters:
The app uses the selected vehicle image to visually align leveling directions, making it easier to understand which side or corner needs adjustment.
The app uses the selected vehicle image to visually align leveling directions, making it easier to understand which side or corner needs adjustment.
Choose the closest match to your RV (camper, van, trailer) for the most intuitive guidance.
👤 2. Profiles
Profiles allow different calibration setups based on phone location.
Examples:
- Dashboard
- Floor center
- Kitchen counter
- Table
- Bed
Create Profile:
- Go to Menu
- Tap Leveling Profiles
- Enter name and tap +
- Place phone
- Tap Set as Zero
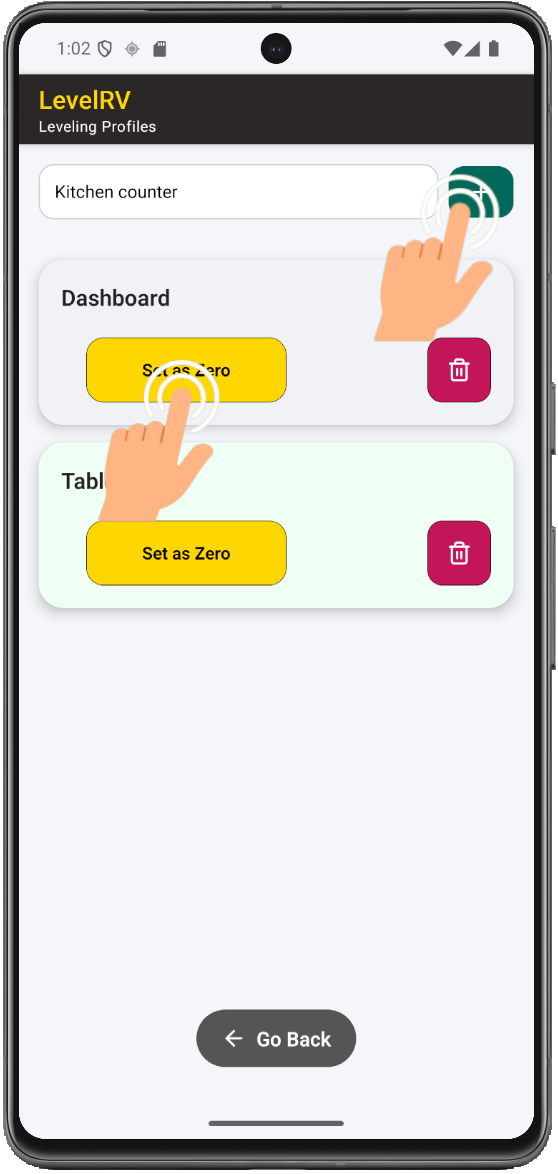
Always use the same phone position for each profile.
🚐 3. Active Use (Leveling)
Steps:
- Park your vehicle
- Select profile or stick to default
- Place phone in saved position
- Follow guidance
Guidance Types:
- 📊 Tilt indicators (left/right, front/back)
- 📏 Wheel adjustments (cm/inches)
- 🛞 Tap wheel for on demand voice read-out
- 🔊 Audio cues
- 🗣️ Voice instructions
- 💡 Enable Keep the Screen On in the top menu to prevent the screen from dimming
Goal: Reach ~0° level. +-1° usually feels perfectly level.
Use 2-stage leveling:
- Rough leveling (quick adjustment)
- Fine leveling (precise correction)
📍 4. Save Geo Location (One Click)
How to save:
- Tap Save Location
- GPS/Geo location is stored automatically
Optional:
- 📸 Photo
- 📝 Title
- 📄 Description
- ⭐ Rating
Save locations after perfect leveling for future reuse.
🗺️ 5. Manage Geo Locations
How access:
- Tap Menu
- Tap My Places
- Tap row / location of choice to edit
Edit options:
- Title
- Description
- Rating
- Photo
Navigate back to the spot:
- 📍 Tap Map Icon on locations list
✅ Summary
- Setup vehicle dimensions and calibration
- Use profiles for different phone positions
- Level using visual, audio, and wheel guidance
- Save great locations with one tap
- Edit and navigate back anytime
Result:
A smart leveling system + personal map of perfect RV spots.
A smart leveling system + personal map of perfect RV spots.